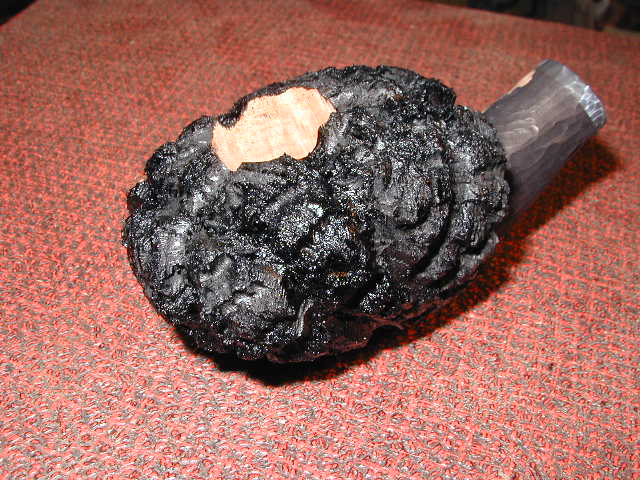
"How do you do your rustication?" That is probably the question I am asked the most. I was the same way when I started making pipes. How should I do it? Am I rusticating the right way? It took a while but I eventually realized that anything goes. There aren't really any classes in pipe making or many books on the subject. There is no governing body in the pipe world that will come in and inspect your rustication and tell you it isn't done right. The most important thing in rusticating is to remember that anything you do will be ok. That said lets get to the good stuff.
Rustication with some sort of specialized tool is probably the easiest method. Many makers use a tool made from a group of screws or nails held tightly together somehow and with a handle attached. The first picture shows such a tool used in the making of Cavicchi pipes. You simply use it to chew up the surface of your pipe. Fast and easy. Very similar to using the homemade tool is using a hole saw blade and the smaller the better. I use a 3/4 inch blade that can be found at just about any hardware store. The second picture shows the hole saw blade and the pair of vise grips I use for a handle.
Again, you just use it to tear up the surface of the wood. After using any of these tools its a good idea to brush the surface with a wire bristle or stiff nylon brush in order to remove any small pieces of wood that might still be somewhat attached. It you don't you could have a little piece come off at some point down the road and leave a glaring spot of bare wood in your otherwise black rustication. On many pipes you will have some areas where the tool could not be used. For these areas you will have to use something else whether its a Dremel bit or some type of small tool to get in and rusticate. I use a philips screwdriver and a 1/4 inch nut driver that I have modified.
I always stain the stummel before rusticating. It helps you see where you have been and it lets you see how much you have done in a certain area. You can use the stain as a gauge by rusticating until all the color is gone or half the color or whatever your goal is. This helps you maintain a uniform looking rustication over the entire pipe, which can be the hardest part.
These two pictures show a pipe after the initial shaping has been completed and then with a coat of aniline dye.
Here I have begun the rustication using the hole saw.
The bowl is mostly done.
Completed rustication and then after being dyed black.
Here is the completed pipe, waxed and ready to go
Another way to rusticate is with a Dremel or some other rotary tool. This is my favorite way and the method I use 90% of the time. You get much more interesting and unique styles with the Dremel as opposed to the hole saw. You can use any type of bit you want and just go over the area you want rusticated. You can use the bit to make lines, or push it into the wood to make little craters in the surface, or whatever you can think of. This is where creativity and imagination come more into play. A single pass with only one bit is all that's needed but the best looking rustications come from making multiple passes with different bits. I generally use 3-5 different bits and work my way from largest to smallest. As with the hole saw method I always stain the wood before using each bit so that while I am working I can tell where I have been and keep things uniform.
Here is a stummel ready for rustication.
I started with a large bit and made some grooves around the pipe. Next I used a smaller bit and made some more grooves and trenches around the pipe. Finally I used a small bit to round off all the edges. With all bits I use a slow speed as this will give a slightly rougher surface than high speeds.
Here are the different bits I use.
Rustication complete and after being stained and waxed.


